Smart Home Devices Installation: Step-by-Step Beginner Guide
Published on: January 5, 2026
Smart home technology is transforming the way we live by providing convenience, security, and energy efficiency. From smart lighting and thermostats to security cameras and voice assistants, smart devices allow homeowners to control their environment with just a few taps or voice commands. If you’re new to smart home technology, this guide will walk you through the step-by-step installation of smart home devices, setup tips, compatibility considerations, and ongoing maintenance practices.
1. Understanding Smart Home Devices
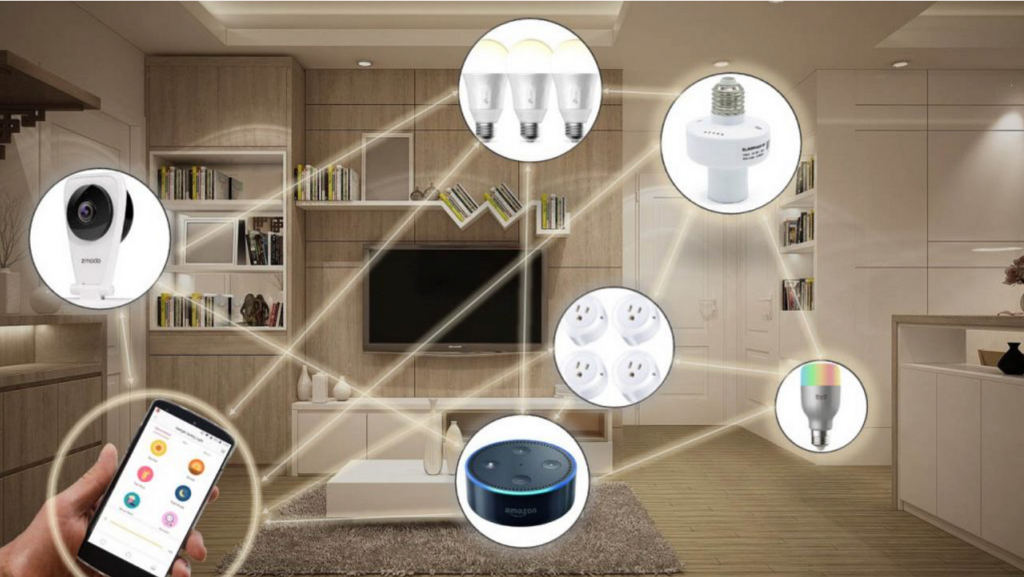
Smart home devices are electronic gadgets that connect to your home network, allowing remote monitoring and control through smartphones, tablets, or voice assistants. Common types include:
- Smart Lighting: LED bulbs, switches, and strips controllable via apps or voice commands.
- Smart Thermostats: Devices that regulate heating and cooling for energy efficiency.
- Smart Security Systems: Cameras, door locks, motion sensors, and alarms for enhanced safety.
- Smart Plugs and Outlets: Allow remote control of appliances and devices.
- Voice Assistants: Amazon Alexa, Google Assistant, or Apple Siri-enabled hubs that coordinate multiple smart devices.
- Smart Sensors: Detect temperature, humidity, motion, or smoke for automation and alerts.
Before starting installation, it’s important to understand which devices fit your home needs, network capabilities, and budget.
2. Planning Your Smart Home Setup
Proper planning ensures efficient device installation and seamless connectivity. Consider the following steps:
- Identify Your Goals: Decide whether you want security, energy efficiency, convenience, or all three.
- List Devices Needed: Create a list of smart lights, cameras, plugs, sensors, and controllers you want to install.
- Check Network Requirements: Ensure a stable Wi-Fi network with adequate coverage in all areas where devices will be installed.
- Compatibility: Verify devices work with your preferred voice assistant or smart home ecosystem (e.g., Alexa, Google Home, Apple HomeKit).
- Budget: Estimate costs including devices, accessories, and potential professional installation.
3. Gathering Tools and Equipment
Most smart devices are designed for easy installation, but having the right tools helps:
- Smartphone or tablet with app installed
- Wi-Fi network with router and password
- Screwdriver set (for mounting cameras or switches)
- Drill (for wall-mounted devices)
- Measuring tape (for proper placement)
- Power sources or batteries, as required
- Level and pencil for precise alignment
4. Step-by-Step Installation of Smart Home Devices
4.1 Smart Lighting
Smart lights can be bulbs or switches. Here’s how to install them:
- Turn off power at the circuit breaker.
- Remove existing bulb or switch.
- Install the smart bulb into the socket or replace the switch with the smart switch.
- Restore power and install the companion app on your smartphone.
- Connect the device to your Wi-Fi and follow the app instructions for configuration.
- Test voice commands or app control for proper functionality.
4.2 Smart Thermostats
- Turn off your HVAC system at the circuit breaker.
- Remove your old thermostat and label wires for reference.
- Install the smart thermostat base and connect wires as per manufacturer instructions.
- Attach the display or controller to the base.
- Turn the system back on and connect to Wi-Fi.
- Download the thermostat app, configure schedules, and calibrate temperature settings.
4.3 Smart Security Cameras
- Determine camera placement for optimal coverage (entryways, driveways, indoor corners).
- Mount cameras using screws or adhesive brackets, ensuring proper angle.
- Power the camera via plug-in, PoE (Power over Ethernet), or battery, depending on model.
- Connect the camera to Wi-Fi through the app.
- Configure motion detection, alerts, and recording settings.
- Test live feed and notifications to ensure proper function.
4.4 Smart Plugs and Outlets
- Plug the smart plug into a wall socket.
- Connect the appliance or lamp to the smart plug.
- Use the manufacturer app to pair the plug with your Wi-Fi network.
- Label the device in the app and test remote operation.
- Optional: Set schedules or timers for automated operation.
4.5 Voice Assistants and Hubs
- Plug the smart hub into power and connect it to Wi-Fi.
- Install the companion app on your smartphone.
- Follow prompts to link your smart devices to the hub.
- Organize devices into rooms or zones for easier voice commands.
- Test basic commands to control lighting, thermostats, and security systems.
5. Connecting Devices to a Smart Home Ecosystem
Most smart devices work better when integrated into a central ecosystem. Steps include:
- Open your smart hub or voice assistant app.
- Search for compatible devices and add them to your network.
- Group devices by room or function (e.g., living room lights, security cameras).
- Create automation routines (e.g., lights turn on at sunset, thermostat adjusts when leaving home).
- Enable notifications and alerts for critical events like motion detection or temperature anomalies.
6. Troubleshooting Common Issues
Even with proper installation, some problems may arise:
- Device Not Connecting: Ensure Wi-Fi password is correct and router supports the device frequency (2.4 GHz vs 5 GHz).
- App Crashes: Update the app and device firmware to the latest version.
- Inconsistent Automation: Check routines, triggers, and device grouping.
- Slow Response: Confirm Wi-Fi coverage and reduce network congestion.
- Battery-Powered Devices: Replace batteries regularly to maintain performance.
7. Maintaining Your Smart Home Devices
Regular maintenance ensures reliability and extends device life:
- Keep apps and firmware updated for security and feature improvements.
- Clean camera lenses, motion sensors, and smart switches regularly.
- Check Wi-Fi signal strength and expand coverage if needed.
- Inspect smart plugs and outlets for wear or overheating.
- Back up routines, schedules, and device settings if the app allows.
8. Security Considerations
Smart home devices connect to your network, so cybersecurity is important:
- Change default device passwords immediately after installation.
- Enable two-factor authentication (2FA) where possible.
- Use a separate network for IoT devices to protect personal data.
- Regularly monitor device activity for unusual behavior.
- Keep router firmware updated to prevent vulnerabilities.
9. Tips for Beginners
For a smooth smart home experience, beginners should follow these tips:
- Start small: Begin with a few essential devices like smart bulbs, plugs, or a thermostat.
- Focus on compatibility: Ensure all devices work with the same ecosystem for easier automation.
- Label devices clearly in the app for simple control.
- Use schedules and routines to automate repetitive tasks.
- Test each device thoroughly before integrating it into a larger automation routine.
- Invest in quality devices from trusted brands to ensure longevity and support.
10. Popular Brands and Devices
Some well-known brands for smart home devices include:
- Philips Hue (Lighting)
- Nest / Google (Thermostats, Cameras)
- Ring (Doorbells, Security Cameras)
- TP-Link Kasa (Plugs, Switches)
- Amazon Echo (Voice Assistant)
- Apple HomeKit (Ecosystem & Device Integration)
- Arlo (Surveillance Cameras)
Choosing devices from trusted brands ensures better support, software updates, and ecosystem compatibility.
11. Advantages of Smart Home Devices
Installing smart home devices offers multiple benefits:
- Convenience: Control lighting, temperature, and security remotely.
- Energy Efficiency: Smart thermostats and lighting reduce electricity usage.
- Enhanced Security: Cameras, sensors, and alarms improve home safety.
- Customization: Automate routines and schedules to suit lifestyle.
- Remote Monitoring: Receive alerts and control devices even when away from home.
12. Conclusion
Smart home devices make daily living easier, more secure, and energy-efficient. By following this step-by-step beginner guide, homeowners can confidently install and configure devices, integrate them into a central ecosystem, and maintain optimal performance. Starting small, focusing on compatibility, and adhering to security practices ensures a smooth, enjoyable smart home experience. As technology continues to evolve, a well-planned smart home setup will provide long-term convenience, comfort, and control for modern households.
Disclaimer: This article is for informational purposes only. Always follow manufacturer instructions and local electrical codes when installing smart home devices.
© 2026 HomeTech Insights. All rights reserved.